Gentlesophs, I am your host, the Kid With A Pen, and welcome to XCOM:
War Interminable - my playthrough of XCOM: Enemy Unknown, with the
Enemy Within expansion, the Operation Slingshot DLC, and most
importantly the Long War mod. Links to all of these can be found on the
"What is XCOM: War Interminable?" page below this post.
Today, we're going to a commuter rail station in Urumqi, China. Why are we going to a rail station? We're going because it's part of our plan to capture an alien battleship intact.
I'll go into detail about the plan later, but for now, let's go on to the mission! Today's team is:
 |
| Our infantry and Patreon contributor, Banzai |
 |
| Our assault, Caper |
 |
| Our gunner, Enforcer |
 |
| Our other infantry and Patreon contributor, Rascal |
 |
| Our scout, Alpha |
 |
| Our other assault, Geronimo |
 |
| Our squad leader, medic and Patreon contributor, Vixen |
 |
| And our sniper, Long Shot. |
We have four transponders that we recovered from the two large landed UFOs we assaulted in previous months, that apparently serve to direct other UFOs to approach and resupply. We're going to use them to lure an alien battleship away from its target, Bejing, and over to Shenzhen, where we'll use Chilong's device to trick the battleship into thinking that the Skyranger is a resupply UFO, which will allow Strike One to board the battleship and hopefully clear it of all aliens and strip it of all technology we can get away with.
First, however, we need to install the transponders on this train and run it to Shenzhen. If we can't get this train moving in the next ten turns, we'll miss our window to divert the battleship, and it'll continue on its mission to attack Bejing. This plan is to send my scout and assaults through the train to set up the transponders (they're the fastest members of my squad), and have the rest of the team back them up - most of them will cover them from the rear, while Long Shot will find a good perch and snipe from range.
Of course, no plan survives contact with the enemy, especially if there are Thin Men involved.
Geronimo goes in to engage the Thin Men...
...and misses. That's fine; the enemy's too far away to just run up to it and shoot it in the face.
Rascal misses the Thin Man.
The rest of the squad moves up and overwatches.
Enforcer misses the Thin Man on overwatch.
Vixen and Banzai, on the other hand, manage to kill another Thin Man on overwatch.
The lone Sectoid ends the turn by suppressing Geronimo.
Incidentally, this is why I brought three fast soldiers on this mission. I can afford to have one or two peel off to attack enemies or be delayed by suppression.
On my turn, Long Shot hits the Thin Man on our flank.
Caper sets up the first transponder...
...and flanks and kills the Sectoid suppressing Geronimo.
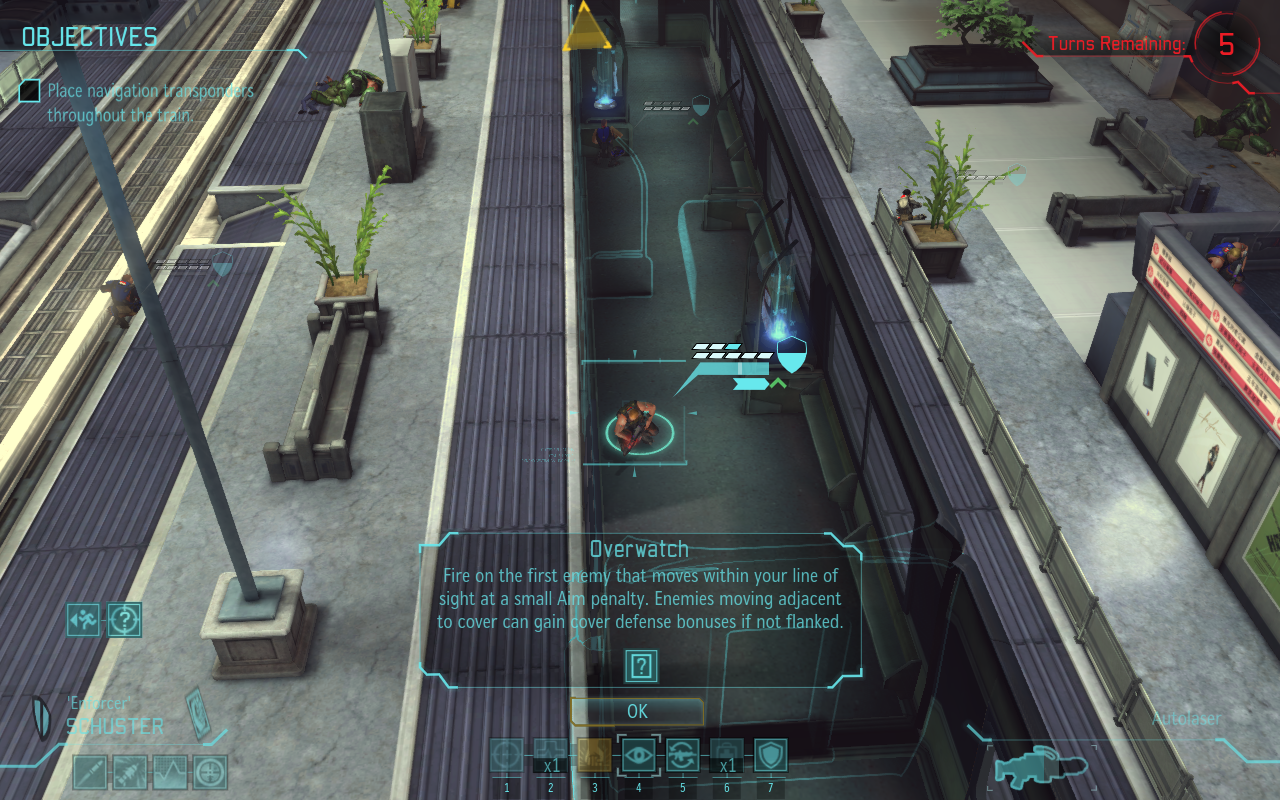
Enforcer misses the Thin Man, but at least manages to get holo-targeting up.
This gives Geronimo the opening he needs to get up close and personal, and blow it away with one blast from his shotgun.
Rascal takes up a supporting position, and the squad overwatches.
And, we have drop ins! One Muton, on the other side of the station.
Rascal misses his overwatch shot on the Muton.
Long Shot also misses the Muton.
Alpha runs the Muton's overwatch. Lightning Reflexes is a godsend for scouts.
Geronimo gets up close and kills it in one shot.
The squad moves up and overwatches.
Contact! Seekers and Thin Men!
Rascal gets a hit on the Seeker, but fails to kill it.
He also needs to reload, which is a problem.
Alpha misses the Seeker, but gets holo-targeting up.
Caper gets the second and third transponders set up, and moves to flank the Thin Man.
Caper gets another flanking kill, this time on a Thin Man.
Meanwhile, Geronimo runs up to the Seeker and pops it like bubble wrap.
Long Shot takes up position on the roof of the train and steadies aim. She'll get some really good shots from here.
Banzai runs up to the top of the ticket booth, ready for action next turn.
Vixen moves up to support him and overwatches.
Contact! More Thin Men. Great.
Another Muton drops down. You know, I was
really hoping for more Mutons.
And yet another Muton drops in, this one right on top of my assault team. This one's actually sort of manageable, especially since it hilariously dropped itself right in the middle of an acid cloud.
Alpha runs the closer Muton's overwatch so that Caper can proceed.
Even though he misses the Muton, Alpha
does get holo-targeting up on it.
Caper moves to flank the closer Muton, but the other Muton manages to get an overwatch shot on her. It misses, fortunately.
"Say hello to my little friend!" Caper gets her third flanking kill this mission. All of them have been against progressively tougher and more capable aliens.
Thanks to Hit and Run, Caper gets to move again after shooting, so she ducks back into the train to prepare to place transponder #4.
Long Shot hits the other Muton from beyond visual range.
Geronimo reloads in preparation to attack the Muton next turn.
The squad overwatches.
And, the Thin Men gang up on Caper. The first one hits her, but the second misses.
Contact! Even more Thin Men!
The Muton takes shots at Alpha, but between full cover and Red Fog, it's not hitting anything.
The Thin Men that just made contact overwatch...
...and another Muton drops down, right into Banzai's sights. He manages to hit it on overwatch.
Next turn! Banzai takes aim...
...and finishes the Muton off. Excellent.
However, he now needs to reload.
Meanwhile, Alpha moves up and shoots at the Muton just to get holo-targeting on it, but instead gets the kill!
His services no longer needed on that flank, Geronimo makes all possible haste to rescue Caper from Thin Man-inspired death.
Vixen gets a hit on one of the Thin Men...
...and Rascal gets the kill.
This gives Caper the window she needs to shoot at the nearest Thin Man, but she fails to kill it.
While Close Encounters gives her a second shot, she needs to reload her shotgun. Her pistol won't be enough to kill a Thin Man in full cover.
Meanwhile, Long Shot snipes a Thin Man from range.
Enforcer moves up and overwatches.
"If you try to run, I've got six little friends..."
"...and they can all run faster than you can." Needless to say, the Thin Man did not survive Caper's CCS reaction shot.
Another Muton drops in, this time in perhaps the most annoying place possible.
At least Banzai can move up to rain death from above, but the one shot he gets isn't enough to bring it down.
Fortunately, we have our squad leader nearby, who can order Banzai to shoot again.
Banzai's second shot puts the Muton six feet under.
Rascal moves up the train and takes a shot at a Thin Man, but misses.
Alpha moves up and reloads.
Caper moves in for the kill...
...places transponder #4...
...and gets her fourth flanking kill this mission.
Unfortunately, she freaks out when her latest kill sprays her with acid.
Long Shot reloads her sniper rifle.
Enforcer finishes up the turn with an overwatch.
A Thin Man gets a flanking shot on Alpha...
...and hits but does not kill.
Another Thin Man drops in, this time right in front of the train. I would love nothing more than to just run this thing over right now.
Rascal needs to reload.
Alpha hits the Thin Man, but more importantly gets holo-targeting up...
...which allows Long Shot to get the kill.
Geronimo rushes up to Caper, but can't get eyes on the Thin Man.
Vixen moves up and reloads.
Enforcer finally catches up to Caper.
Geronimo overwatches in the hope that he can get a shot off on that last Thin Man.
Unfortunately, he can't, and the Thin Man flanks and almost kills Caper.
Enforcer gets revenge for Caper, and blows the offending Thin Man away with his autolaser.
Greta "Caper" Basso - wounded, broken, but not defeated - gets to the front of the train and starts it up. All aboard!
And despite all of the structural damage the train has sustained, the train gets going...
...just in time to draw the battleship's attention. Vixen's squad will have to stay with the train, in case the aliens try to attack it again. Also, someone needs to drive the damn thing.
Op success!
That was a good mission. We got a few promotions, and nobody died.
The haul we brought back wasn't too shabby, either.
So, phase one of Operation Slingshot was a resounding success. It'll be a little while before the battleship is where we want it, so we can afford to take a little breather before we send the next team in.
Long Shot made Tech Sergeant, and gained the Platform Stability perk. Platform Stability gives a +10% buff to Aim and crit chance if she doesn't move before shooting. Given that she's a Precision Shot sniper, she can't move and shoot in the same turn anyway, so it's a good perk for her.
Enforcer made Sergeant, and as the next part of his progression down the Bullet Wizard build gains the Will to Survive perk, which gives him more damage resistance if he's in cover and not flanked. Given that Bullet Wizards are mainly supposed to be suppressing things, they're high-priority targets, and the additional survivability is helpful.
Caper made Tech Sergeant, and gained Resilience, which makes her immune to critical hits. Probably an essential perk to all Assault builds.
Anyway, it's about time we got some laser pistols. They won't be ready in time for the battleship assault, but it'll be good to have them nonetheless.
Back to the Hologlobe!
After a few hours, the time has come to strike the battleship. Shen's team has fitted Chilong's device to the Skyranger, and we need to bring our A-team on this one.
Because Chilong's device is tied specifically to this particular battleship, we only have one shot at this.
Joining us on this mission is a new infantry specialist we got from the German Rapid Forces Division, Sergeant Luther "Bull" Steiner. I'm going for a crit spam build with him, to offset our large numbers of overwatch infantry.
Leading this mission is Congo, with the standard medic loadout.
Bull takes the standard infantry loadout, packing alloy plating instead of ceramic inserts.
Trips is our other infantry on this op. Unlike Bull, Trips is an overwatch infantry, and I suspect we'll need both on this mission.
We're bringing Smokey on this one as our gunner. More firepower is always desirable in this situation.
Shearer is coming along as our scout. I realize that a Lance Corporal might be too low-ranked to bring on a mission of this importance, but she can dodge bullets and has holo-targeting. That's really all I require of my scouts.
Of course, we're not going to leave the base without taking Boom Boom along. We'll need the sheer number of rockets she's packing.
The Skyranger brought back the people from the last team that required medical attention, but Geronimo came along when he heard that we needed an assault. Even though he still hasn't recovered from the last op, we're desperate enough to bring him along.
Last but not least, our special contributor, the lovely-but-deadly Brienne Frost is our sniper. The situation isn't desperate enough that I need to bring back Checkmate or Long Shot on while fatigued, and I suspect she'll do fine.
Big Sky has reached the mission site. Time to capture us a battleship.
And that's where I'm going to leave this update here for today. Because this next mission is going to be a huge one, I'm updating XCOM: War Interminable every day this week through Black Friday. Join us tomorrow
for Operation Devil's Paramour! Remember, you too can join the fight by
going to
https://www.patreon.com/user?u=177434 and subscribe today! Every subscriber gets to have a rookie named after them!
Can't subscribe to my Patreon campaign, but still want in on the program? Go here to see how you can get in:
http://xcomwarinterminable.blogspot.com/p/join-fight.html With that, I hope to see you next time!


No comments:
Post a Comment